
The gallery wall in the living room / office is up! It took a while, but I definitely think it was worth it  I started with a push pin board that I made out of an old frame, you can read more here
While David and I were in Home Depot picking up wood to build the sofa table … I found this image on Pinterest and thought that it would be a perfect solution for the gallery wall – so we grabbed materials for that and got to work!

Pinterest links here but I couldn’t find the original image …
We needed something that would be light to avoid the curtain wire sagging, so this was perfect!
Then David cut the frames with our fancy new saw – he has used it for the desk and chairs, the sofa table, and the tv stand (photos soon!) and so far he loves it!

1. Screen Mold (1/4″ x 3/4″ x 8′) was selected to make the frames out of – We decided on a composite because it was about half the price of wood
2. After determining the size of the frames needed, screen mold was cut on a 45 degree angle with the chop saw
3. frames were glued with super glue
4. After the glue dried, I primed and applied a top coat of spray paint (I waited about 30-45 minutes between coats)
5. To hang the art – I used a grommet kit to attach the wire between the paper and frame (thanks for the idea Flea Market Finds with Matthew Mead!)
I followed the directions on the package, except I used a hole punch instead of the tool provided because it was much easier, I would recommend!)
6. I used a rubber mallet to fasten the grommets in place
7. We hung Ikea’s Dignitet curtain wire system and used Ikea’s Riktig curtain clips at the top and we fastened two eye screws at the top of each frame to hang the wire from – making sure that it was tight!
8. We hung the frames and art with thin gauge wire, and attached them to the curtain clips (wire was simply twisted at the end to secure)
Finally, we used a level to help get everything straight!


I brushed on watercolor and then cut circles out with a 1″ hole punch (thanks for the circle punch art idea Mer Mag!)

I made a print of special dates to us …

Annabelle on the top and my two sweet kitties that couldn’t make the trip to CA (they are currently being spoiled by my parents and even turned my Dad into a cat lover


Some of my favorite pics of Annabelle playing fetch at the baseball field

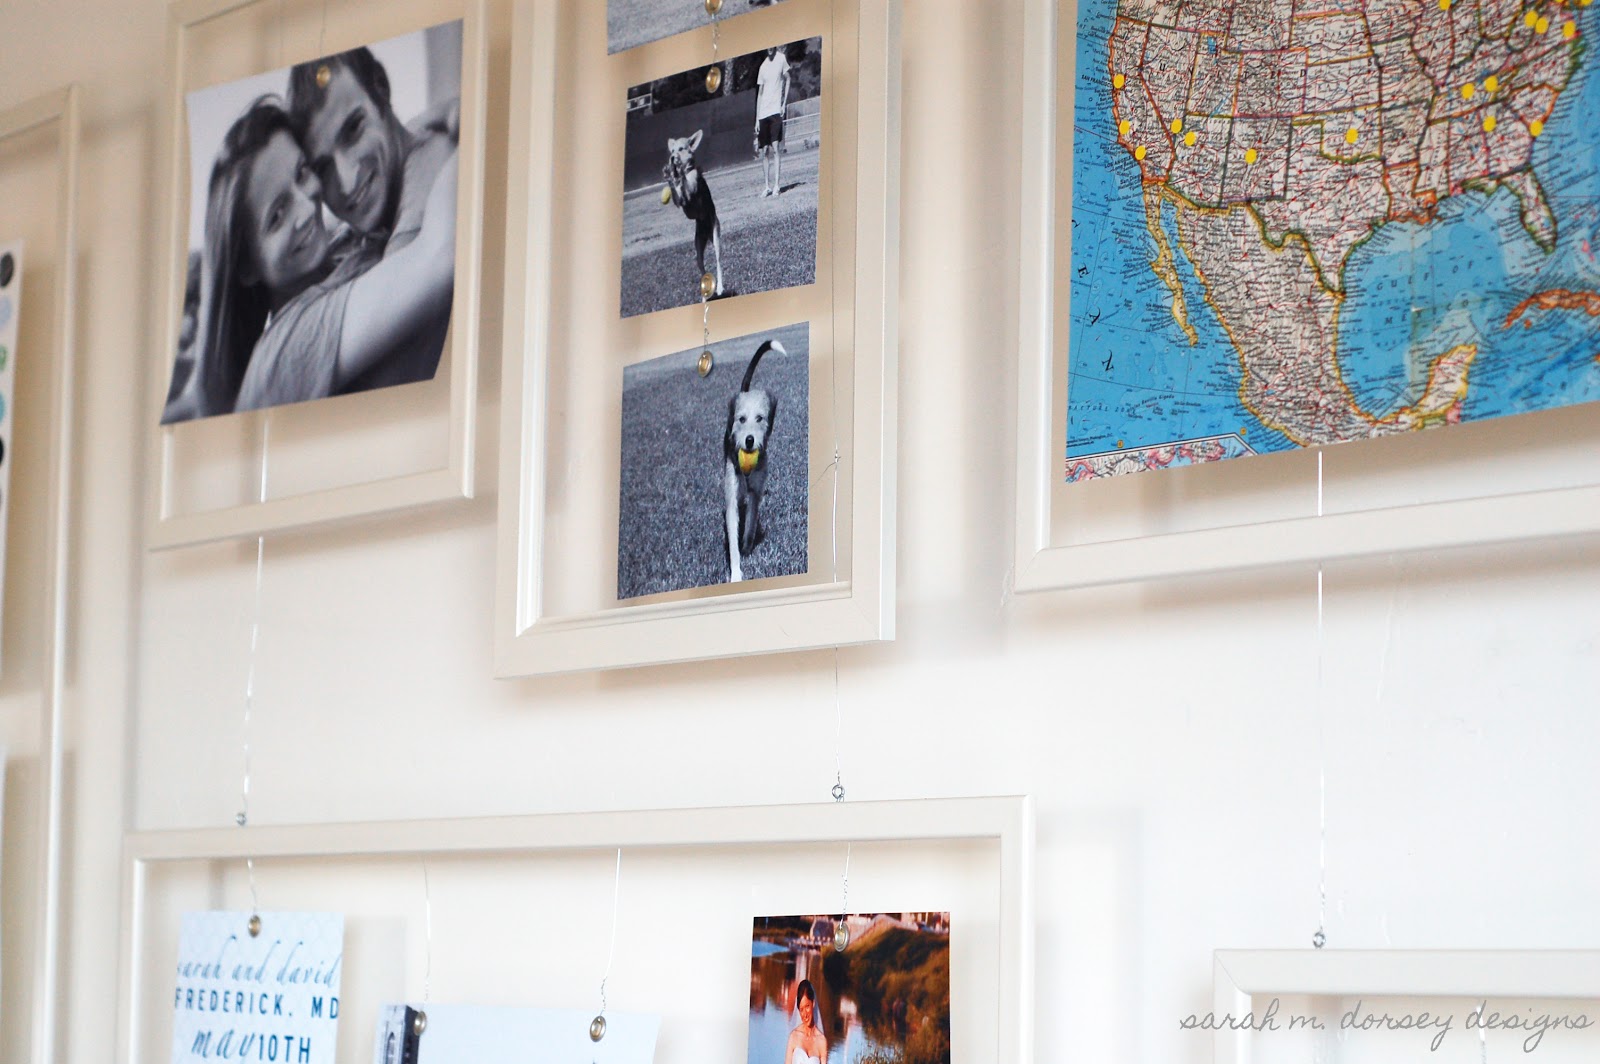

Finally, I found a map of the US circa 1960’s at a thrift store and put circle stickers on all the places that David and I have visited together – clever idea via Young House Love
and there you have it!
Cost Breakdown:
14 Frames – $20.60
Spray Paint – $7
Wire – $2.50
Eye Hooks – $4
Grommet Kit – $9
Curtain Rod and Clips – $15
Total Cost = $58.10
This idea worked perfectly for us since we are renting (less holes to patch when we leave!) and I love the shadows that are created by the floating frames!
14 frames for 20 bucks?! From where??!!
Hi Chelsea! We made the frames out of screen mold ($2.29 for a 8' piece) purchased at home depot (steps 1 – 3 in post above) Hope this helps!
The additional splash of color makes everything nicer!
I love it Sarah!!
Would this idea be strong enough to hold plates or even record covers? Or due to weight would an actual rod be better?
I would think plates would be too heavy, the record covers would probably be light enough! Let me know if you try it!
I love, love, love the wall. I especially love the special date frame. You are so talented and I love your ideas.
Where are your lampshade and rug from?
I covered the lampshades with Waverly Lovely Lattice (Lagoon, sun n shade line) and the rug was purchased from TJ Maxx (Zalya is the brand)
Can't wait to try this in my nest! Thanks it looks amazing in yours!
Hi – love love your wall. Does the bottom of the pictures wind up curling up b/c they are not anchored??
I love your special dates one too and the integration of the teal color. Do you remember what font faces you used? I would love to replicate this.
Robin
Hi Robin! Some of the photos came out of the printer a little curled. The thicker the paper you use the more straight it will be(I used watercolor paper for some and it was very thick) I would think that using thicker paper would be better than securing at the bottom to keep it fr curling. Hope that helps!
How do you keep the paper straight in the frames and prevent it from curling at the edges?
Thicker paper helps keep it from curling on the edges (I used watercolor on some) and the thin gauge wire bends easily to get it staight and then it holds in place
Great – thanks! We've been looking for something for our dining room. This is happening ASAP.
A
Let me know if you try it! I'd love to see!
Hi! I would love to do this but am wondering if you have suggestions for making the frames without a chop saw? I think I have the tools to do everything else. Thank you!!
Hi Liz! A miter box and hand saw would be a lot cheaper or you could look for thin frames from thrift stores and take out the glass/backing – let me know if you try either
We're pick.. You have a really nice choice This will really uplift the look of my Home Office
Who would have thought that gallery walls can be made in such a way! Thanks for this creative idea! Now, busy individuals do not have to worry about missing their business corporate events because they can just take a glimpse of this unique piece they have on their wall!
Hi.I clicked over from Apartment Therapy. (No work today–hurricane Sandy–going through old emails) This is so clever and nice-looking. What a terrific blog you have!
Thanks so much Aidel!
Hey Sara great job on the gallery wall looks awesome! By chance what would you guesstimate (lol) are the sizes of your picture frames individually?
Nique
Hi Nique, I measure a few at about 30×34, 34×17, 14×20,15×15, 15×8, 9×7, 9×8, the rest are about the same size just slightly different. The sizes are random because we made them custom
Hi Sarah! I LOVE your take on the Gallery Wall and it's definitely a project I want to try but I can't seem to figure out how you keep the picture's from curling up/swaying within the frames… do you have a piece of wire running along the back of each picture? What is your secret?! Any advice would be greatly appreciated
– Melanie
Hi Melanie! Thanks so much! I didn't have an issue with them swaying in the frames. If you paper isn't thick, I would recommend applying to thicker paper with spray adhesive and then trimming the edges. I did this on some of them and it worked really well! Also, if you add more weight, you may one to add extra of the center supports (Ikea sells them separately) to avoid the wire sagging. Hope this helps! Let me know if you try it!
Sarah
thanks for the information. This will make a great weekend project for me….do you have any advise on how to do some type of lighting system to accent these pictures. I live in an apartment.