On Monday’s post I shared a few photos and why this desk wasn’t a weekend project and how it could be. Today I’ll talk about how we built it. Again, a big thank you to David for doing most of it, I was more of an assistant on this project!
First, we calculated the amount of wood we needed and off we went to Home Depot to pick up our supplies:
1×12 Poplar (about 10′)
1×2 Poplar (about 48′ – we made a second trip for more wood, so I think this is about right 🙂
For those not familiar with American terminology for wood, for some reason a 1×12 isn’t actually 1″ tall x 12″ wide it is really 3/4″ tall x 11 1/4″ wide. Same applies for other sizes too, like a 1×2 is really 3/4″ x 1 1/2″. I know, weird. Just wanted to go over that upfront since I talk about measurements below 🙂
Anyways, total for the wood was around $100
We also needed:
Brass Screws
Wood Glue
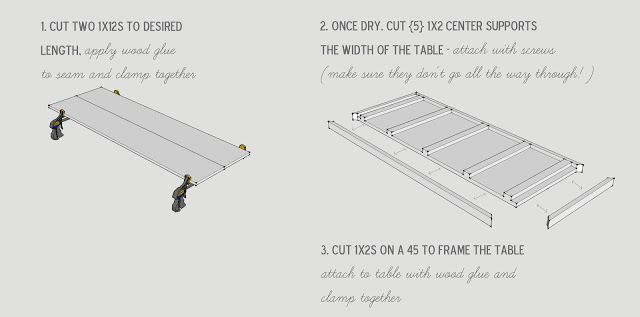
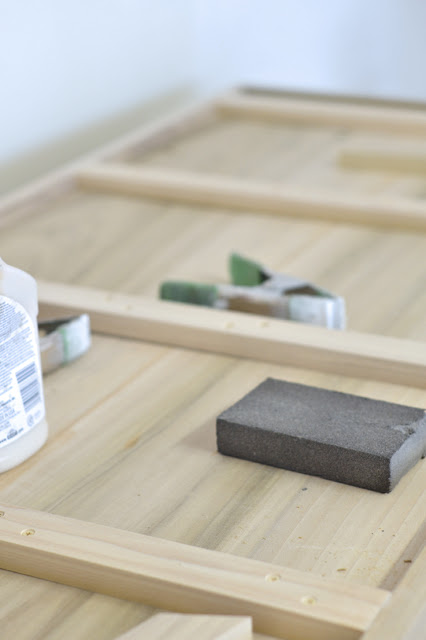
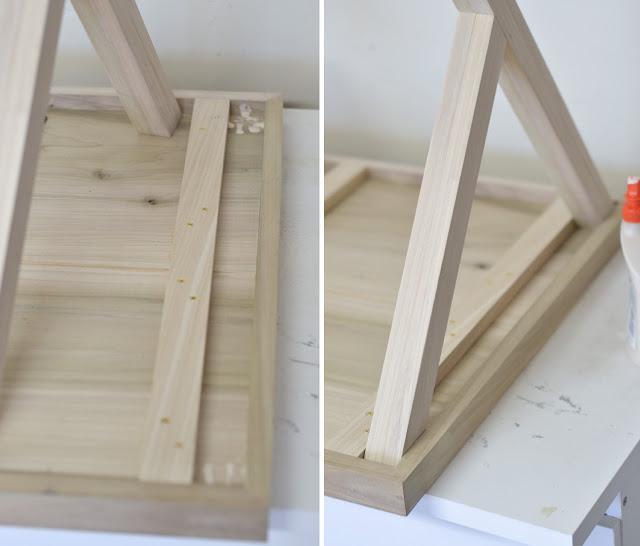
Then the two 1x12s were cut and glued together and held with a clamp. Once dry, 5 supports were cut out of 1×2 poplar, the same width as the top and attached to the bottom of the desk with glue and screws and clamped to dry (The last support should be snug against the leg so make sure to account for that- see photos towards end of post). Then 1x2s were cut at a 45 to make the outer frame, glued and then clamped in place to dry. If you have any gaps use a small amount of wood filler to fill them.
After everything had dried, all the edges and where the wood meets was sanded with the orbital sander (120 and then 220 grit)
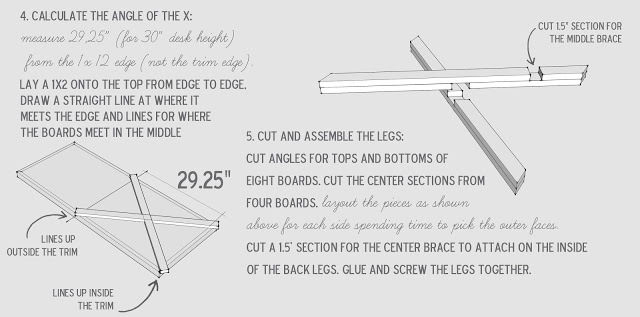
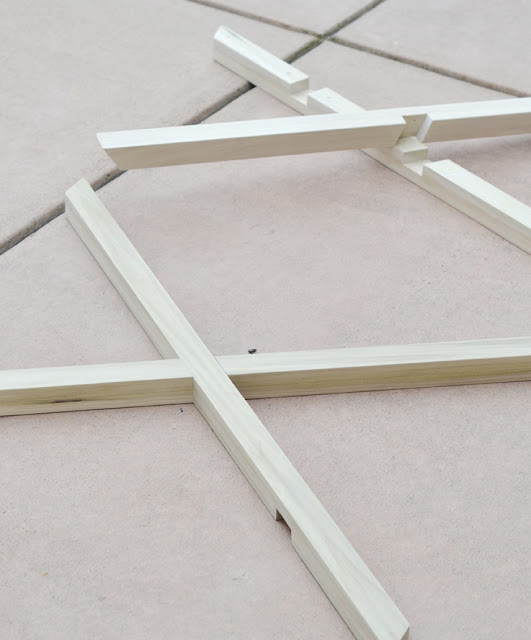
Next, we calculated the angle of the X legs. On the table, we started at the edge of the 1×12 (not the very end at the trim) and measured 29.25″ for a 30″ standard desk height accounting for the .75 top too. We laid two 1x2s on top of each other in an x on the desk top. Lining the top board with the outside of the trim and the bottom with the inside of the trim. We marked with a pencil where the boards intersect in the middle and a straight line at the top and bottom.
Next we cut the angles (which were just marked) for the top and bottom for eight boards (4 for each x-leg). We then cut the center sections (drawn where the legs cross making the X) on four of the boards.
If you use a wood like poplar with a lot of variety in color and grain, you will want to spend some time to match similar boards for each leg.
Last, we cut a 1.5 inch section out of the inner rear leg to later attach the center brace.
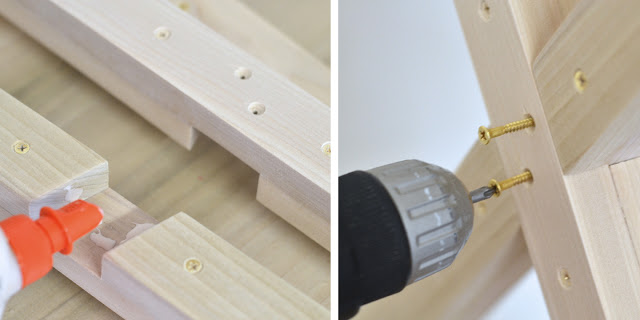
Now to assemble the legs! We applied wood glue to all of the pieces, clamped them together and screwed them from the inside. We assembled the four pieces as shown below and then sanded them to make sure the connections were seamless.
After sanding, we applied glue and screwed the individual legs together creating the X.
Once the X sides were complete, we applied glue to the corners and sides and set them in place.
For extra support, we added wood angles to lock the legs in place. David cut a few angles to find the perfect fit and then cut the angle so it would sit flush with the trim. it was glued and clamped in place.
After the legs were set, the center brace (going between the X sides) was glued into place. The center brace was constructed of two 1x2s cut to the width of the table minus three inches (for the trim and outer board of the x-leg)
And that was it! You can see that we used a combination of wood glue and hidden (or less noticeable screws) for the construction. As long as the wood glue dries thoroughly and is clamped to dry, it is very strong! For areas that have more stress, like the legs and table top center supports, we also used screws in addition to the wood glue. I’ll take more photos once we have the office complete, but since I took the photos, I also have my large Mac desktop on top and it is very solid.
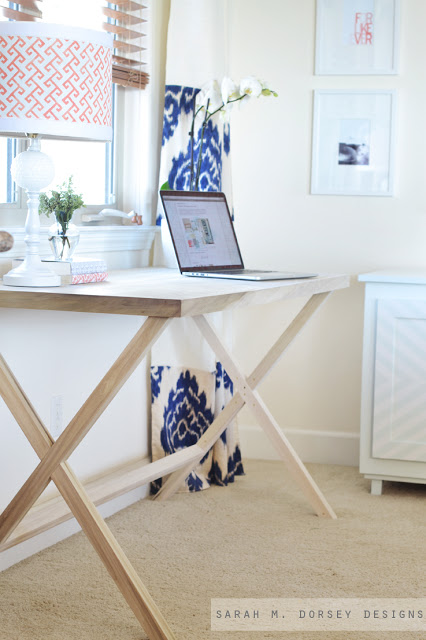
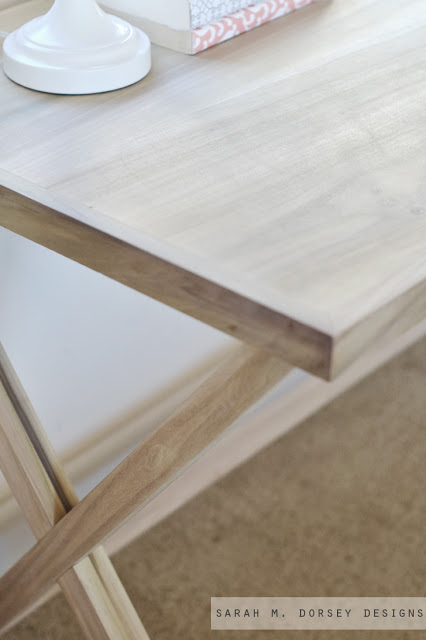
I love the grain of the poplar! It probably isn’t for everyone, in fact as I was looking at hardwoods online, I saw some references to it as the ugly hardwood. The nerve! I’m thinking they were referencing the extreme difference in grains … so it does take more time to pick out ones that are similar.
The desktop looks like one piece of wood because we chose wood where the grain would match, also sanding it until it was smooth helped even out the line.
I think the legs look pretty seamless too …
If we were building this again, I probably would use oak due to it taking less time in sanding, see Monday’s post for my full explanation of why wasn’t a weekend project and how to turn it into one!
The total cost was around $100 for wood and about $10 more for screws and wood glue if not already owned. So about $100 cheaper than the World Market equivalent
I’m off to get supplies and work on my next project … follow me on instagram @sarahmdorseydesigns for sneak peaks!



The result is so fantastic and your diagrams are so easy to understand. What do you use to make them? I've struggled with that in my tutorials. Also, I love your explanation of how you found the angles, I think I used a much more complicated way when I did the x benches. So I can apply this technique to future projects, why 29.25" for a 30" table?? Would you always subtract .75" from the height?
The bomb, as usual!
Good questions 🙂 I use sketchup, it's an easy way to make 3d drawings. It's a free internet download and not too hard to learn, I love it! Thanks for letting me know that the diagrams helped, I'll try to do it in the future.
I forgot to explain why the height of the legs was 29.25" (kinda important :), thank you for asking! Since they are under the table top (which is .75" thick) it adds up to 30".
Thanks again for asking the questions that I left out! 🙂
Kind of "duh" on my part on the leg length…thanks for explaining! Have downloaded Sketch Up, now just need to take some time to learn it!
Not at all! I didn't fully explain it. I guess you can kinda see it in the pics, but it was confusing 🙂
I love how it turned out and I really like that you kept it natural I love the look of the grain!
OMG!! I love this! Thank so much for a great tutorial! Beautifu desk…I am drooling!
You two really do do beautiful work!
Seriously, you guys are amazing!
Very pretty! Not sure I could get my hubby on board with that much diy:)
That desk looks great! (Should show those drawings to my hubs….) And just on a technicality note…'back in the day' a 1×2 and 2×4 and so on were that size but now due to the process used for cutting it's just short of a 1/4 inch or so…. :S
This is so amazing! I would love to make something like this for my office.
Jenn
With Luck
Wowee! That's amazing.
Beautiful! How did you finish it? Was it stained or sealed at all?
Hi Jesse, Water based poly in satin, for a natural look 🙂
it looks amazing!! I'm finding all the things on home depot online since i don't live in america and plan on shipping it to where I live because the hardware stores around me don't have it. Just wondering what size the brass screws are?