Today I’m sharing our final project from Creating with the Stars, if you missed the tutorial on East Coast Creative, read on!
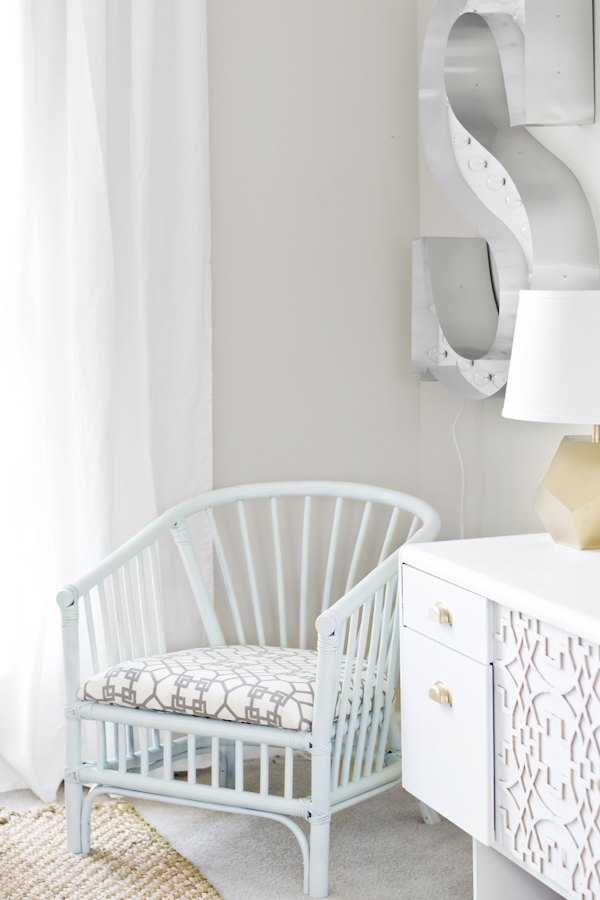
Recently, we moved to a Tennessee on a short term assignment (for David’s job). Even though we’re only here short term, I still wanted to make it our own. For my office, I added an accent chair and a large marquee letter.
Here’s the start of my new office!
DIY marquee letters are nothing new (just to name a few .. here, here, here) but it’s one of those things that I HAD to try. I just couldn’t get it out of my head!
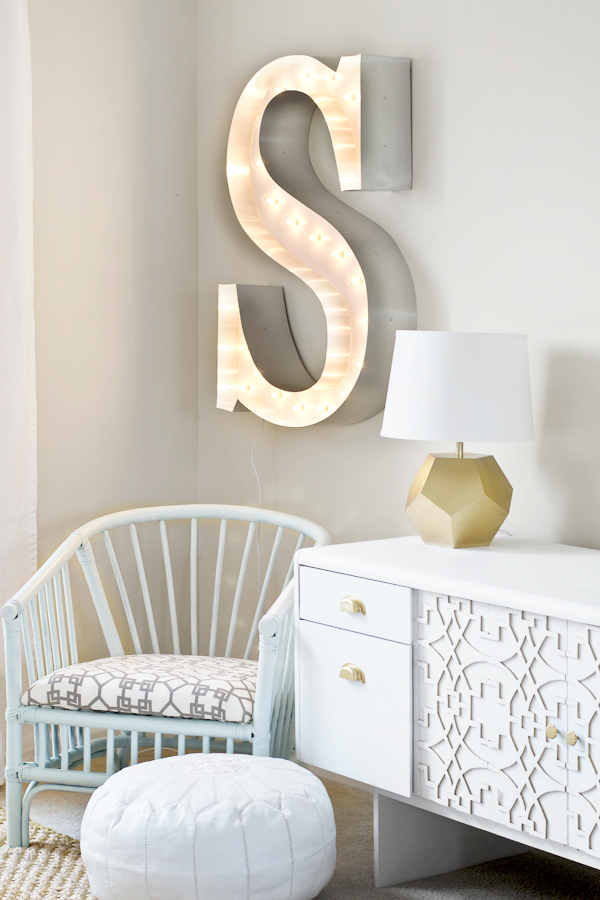
Here’s our version!
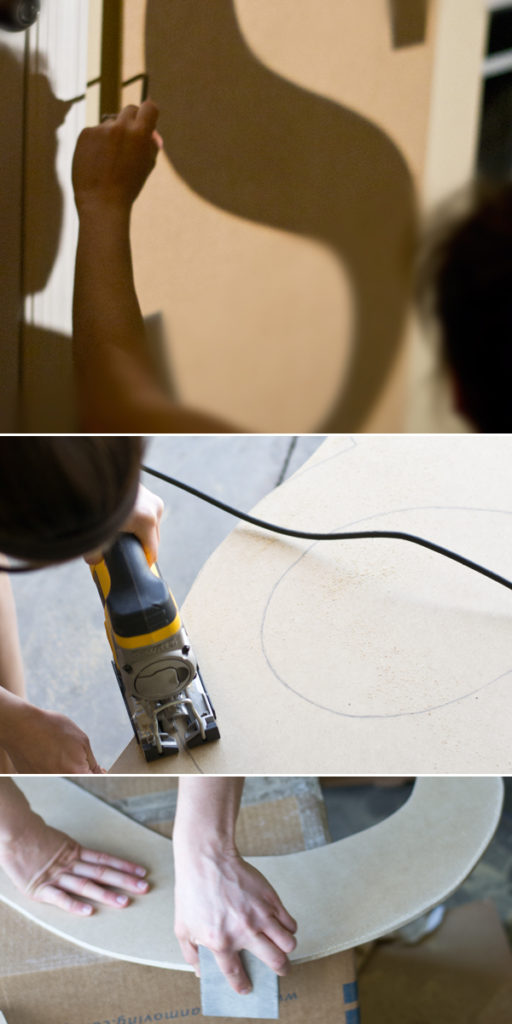
Materials needed // 2’x4′ – 1/2″ Plywood/MDF (we used 1/4″ but the screw placement had to be exact, which made it difficult. // 6″ aluminum flashing // clear globe string lights // spray paint // small screws // fast drying glue // caulk
Tools needed // jigsaw with fine wood cut blade // drill with 3/4″ bit // painters tape // sandpaper // tools to bend flashing (wood block, metal spackle took)
1. Print letter on 8.5×11 and project it on 2’x4′ MDF or Plywood, trace with pencil (I have this projector. If you don’t have a projector, free hand, if you’re comfortable or get it printed large at a local printer)
2. Cut letter with jigsaw. Try to be exact as possible, this will help later when applying the flashing.
3. Lightly sand edges
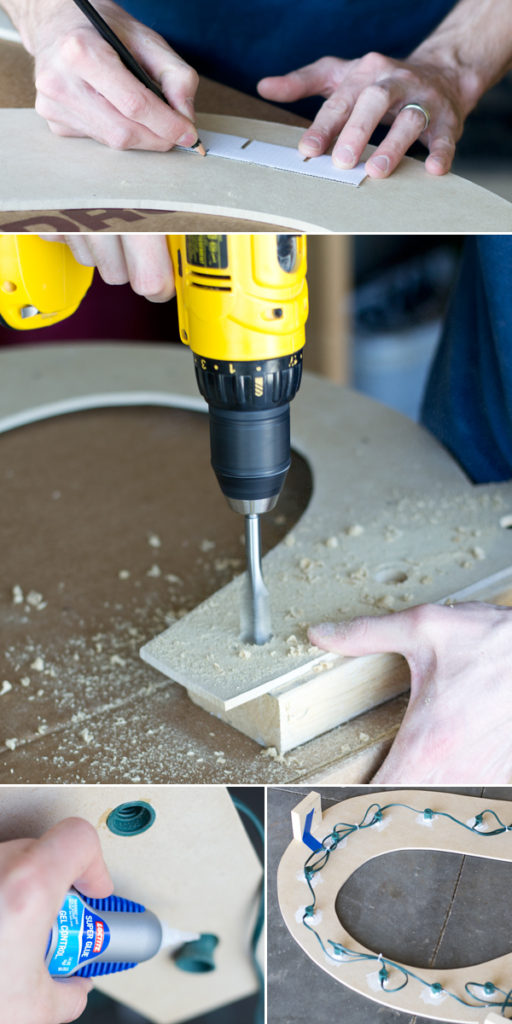
4. Measure bulb placement – find the center and then space them equally. Ours were 4″apart.
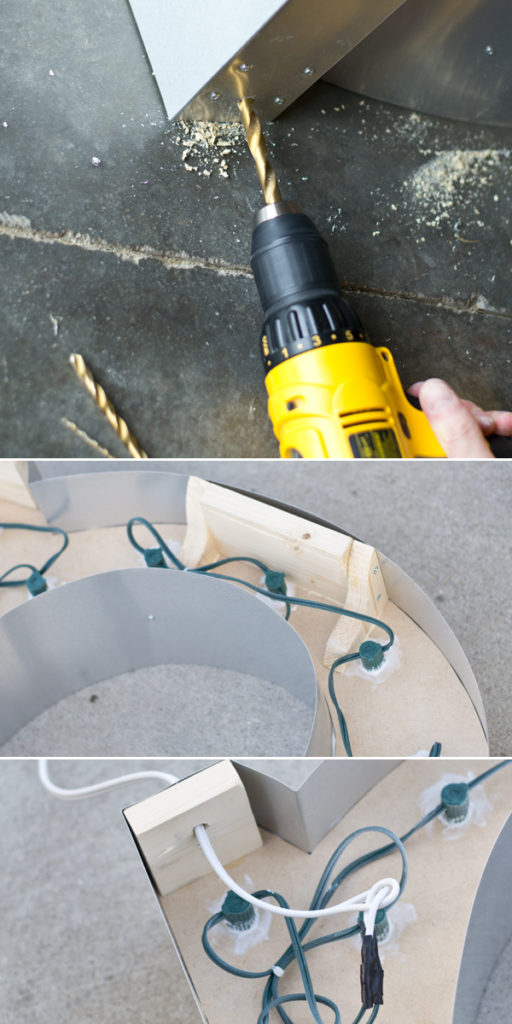
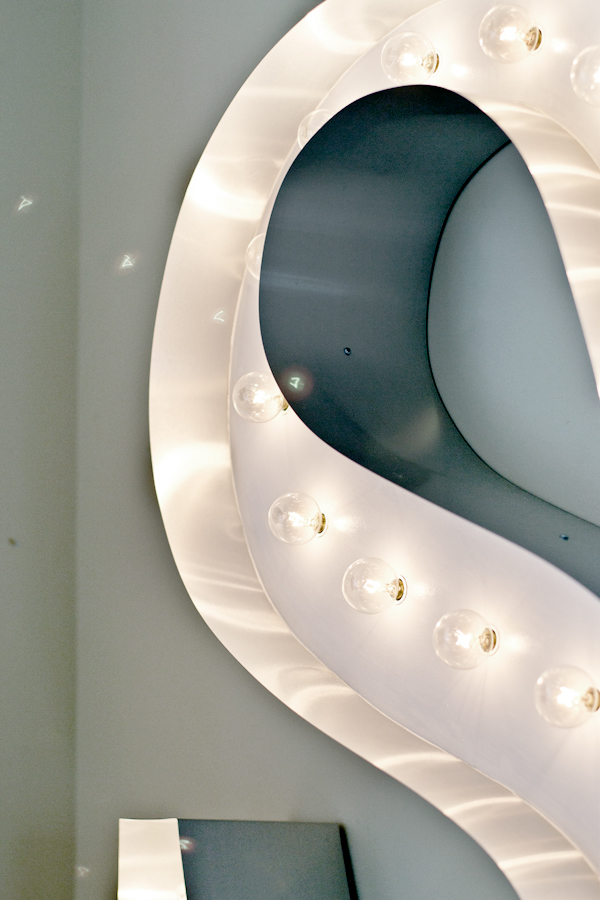
5. With 3/4″ bit, drill holes for lights.
6. Push the lights from the back and secure lights from the front with a strong, quick grab glue. Apply caulk from behind to stabilize and seal the sockets.
7. Since our MDF was fairly thin, we added a few wood blocks to help stabilize it. This also lifted it off the ground so that the flashing was centered on the sign.
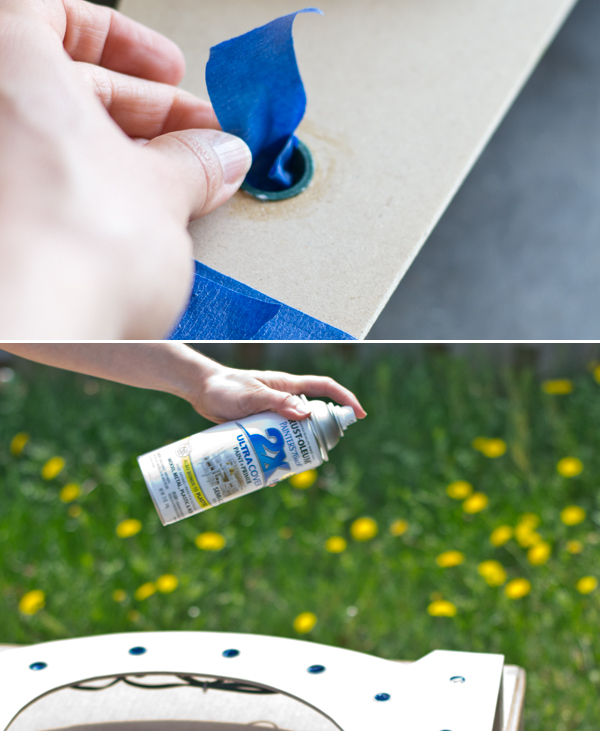
8. Get ready for paint. Fill in socket holes with tape.
9. Spray paint the front of your letter.
10. Apply your flashing. For the corners, we bent the flashing using blocks of wood, a metal spackle tool and clamps.
Note: the flashing is very sharp, so we recommend that you wear safety gloves. We opted out since it was hard to handle with gloves on. We did cut ourselves ..
11. Mark where the flashing hits the MDF and drill a hole for the screw through the flashing (also pre-drill your hole in the MDF) Secure the flashing with small screws.
12. Fill in the gaps with a quick drying caulk. First apply painters tape to the flashing for easy clean up.
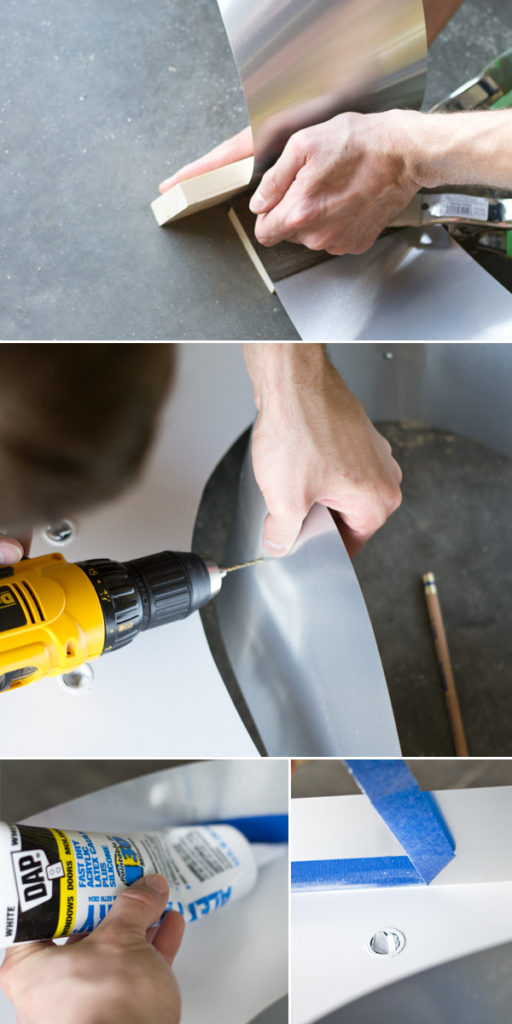
13. Drill a hole in the bottom for your cord. Apply a rubber gasket or caulk to protect the wire from the sharp edge.
14. Install hanging hardware. We installed a 1×3 board at the top with a notch for the screws to sit in.
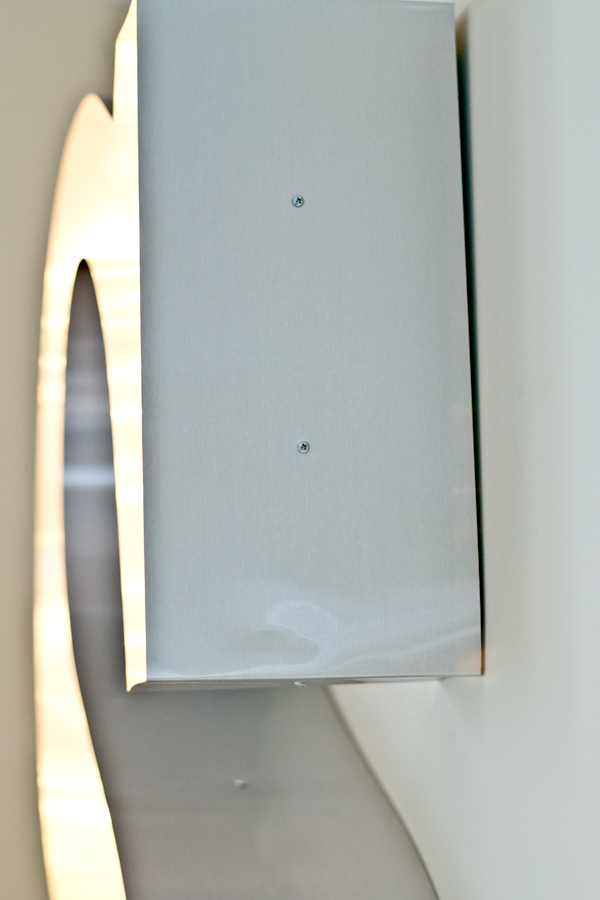
15. Wire your light!
Plug in and enjoy!
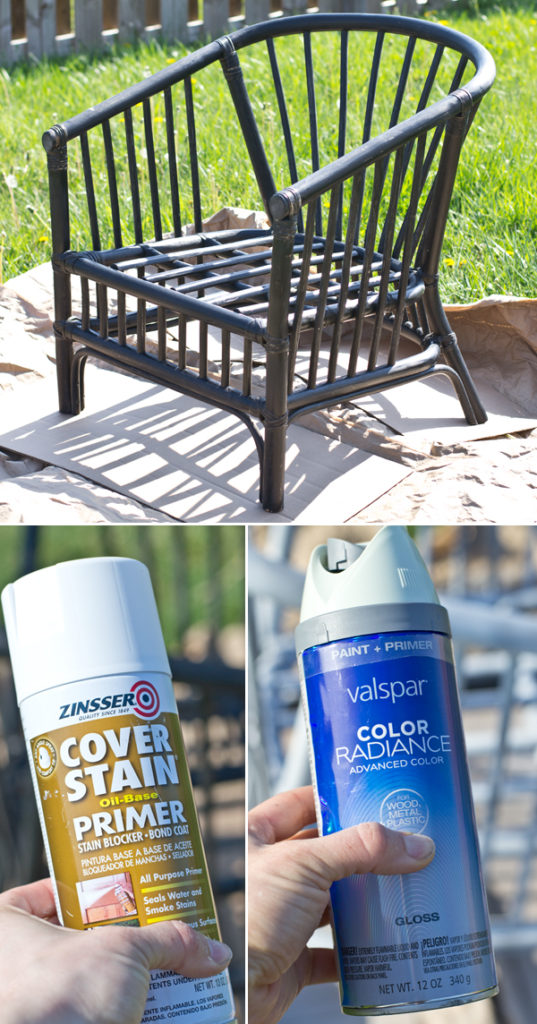
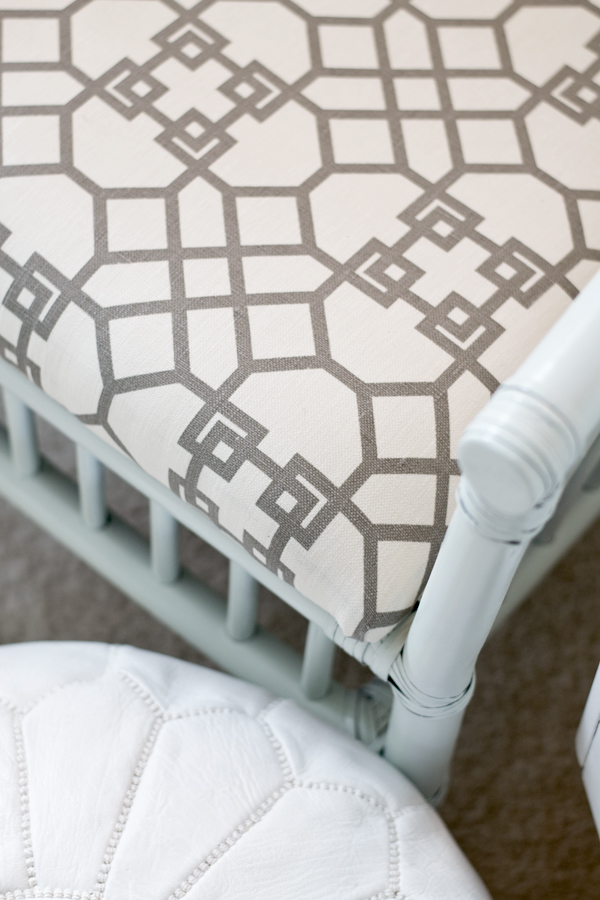
Next, we added additional seating with a rattan chair. We lightly sanded, wiped it down with a microfiber cloth, primed and painted a light mint, Valspar mellow spring (it took two cans).
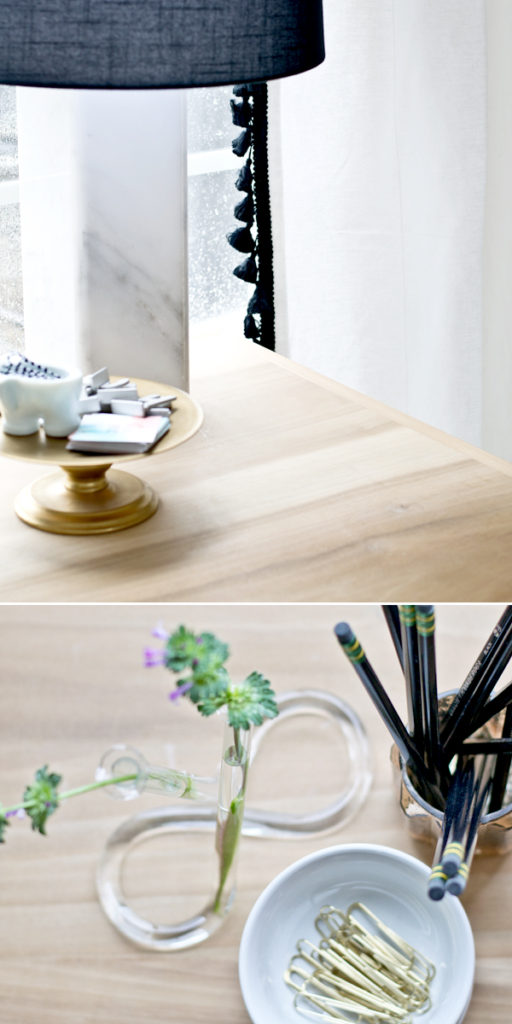
Love this test-tube-like bud vase, found at a local vintage shop!
Practically my entire office has been DIYed, here’s a few of the other projects! commercial to custom credenza with overlays // black and white striped upholstered chair // x-leg desk // gold geometric lamps // marble lamp base out of baseboard tile
I love how my office is coming together! Having an organized place that feels like me is a great constant as we’ve been moving!
Stop back tomorrow to see my damage free – renter friendly draperies!
And it is all so so good! I love those pale Valspar colors.
What a fun little project! I love that you used aluminium. Wouldn't this be cute as a "nightlight" for kids?!
i adore it and i really love that whole vignette! looks amazing! i bought an amazing bamboo piece this weekend at lucketts- i am late to the bamboo party but loving it so much.
Looks so great Sarah You guys did a professional looking job
  Still loving that credenza! xo Kristin
This looks amazing, you make it look so easy I wonder if I can pull this off. I would like something like this with our initials for my upcoming wedding.
Your projects are always top notch! I love the large scale of the letter you did. I would love to try this one day!
That looks so professional! I love the detail like the screws on the side. It looks so polished and industrial!
Hi Sarah,
I love all of your projects, especially that lamp. I found some tile the other day and think I might just have to make one! Great use of the flashing for the letter too
I love how you took a well known type of project, but put your own spin on it. I really like that you can see the screw heads on the flashing. Super pretty project