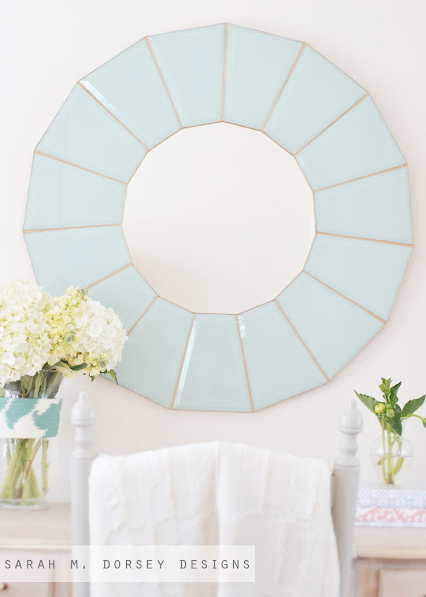
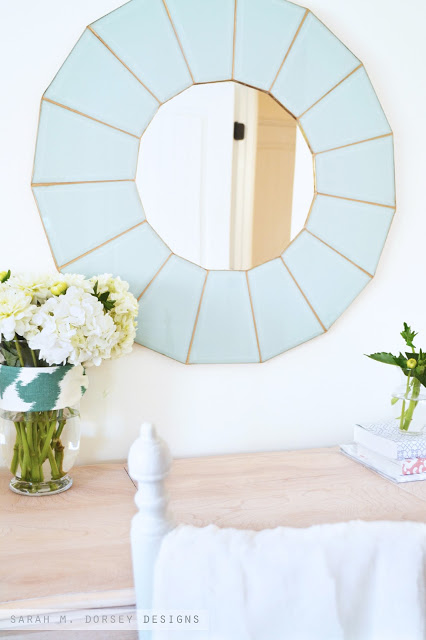
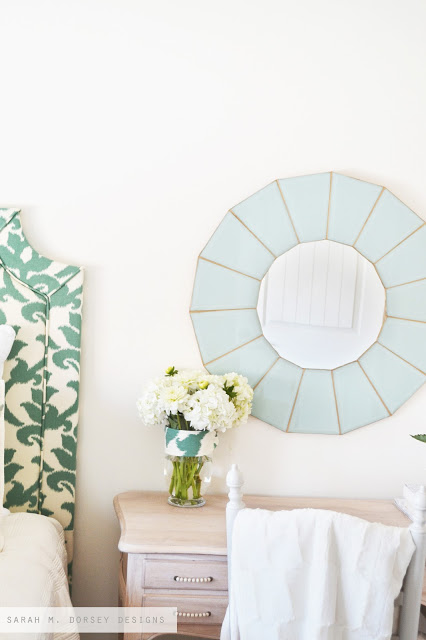
Friday I finished my DIY glass pane mirror and I am in love with the finished result!
Like I mentioned on Friday, we decided to hang it in the guest room above the desk (from the master bedroom) and moved the coral dresser next to the closet (I plan to also turn this into my sewing/diy room)
Here’s how we did it … (with a few tweaks of what I wish we would of done to make it faster)
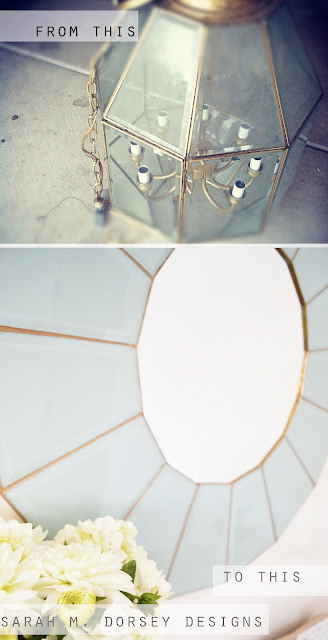
We took apart this 80s chandelier (in EVERY thrift shop) and removed all the metal from the slanted glass panes.
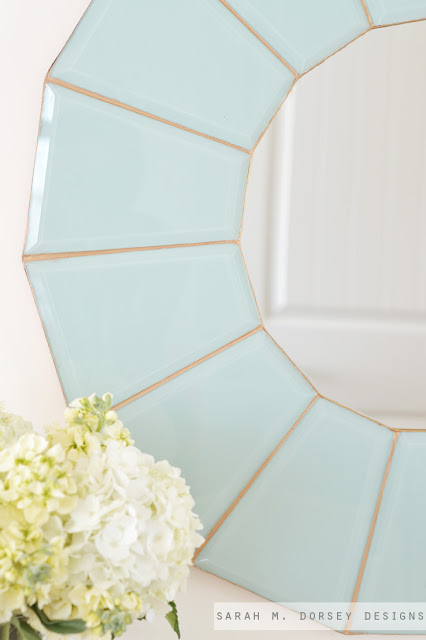
Our chandelier had 16 (7.25” long and 5.75” at the widest point) slanted glass panes – we used 15. The finished mirror was 28.75” in diameter with 1/4″ spacing between the panes.
1/2 sheet of 3/8″ plywood (Ace Hardware lets you buy 1/2 a sheet)
Paint
Weldbond glue
Jewelry wire
Melamine edging
15″ round mirror
Grout
Rub n’ Buff
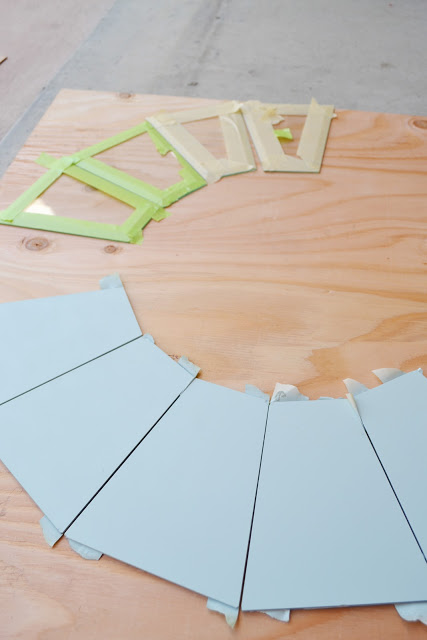
We laid out the glass panes in a circle on a piece of plywood slightly larger – since our panes wouldn’t work without a gap, we gradually adjusted until the spacing was equal (about 1/4″ between each)
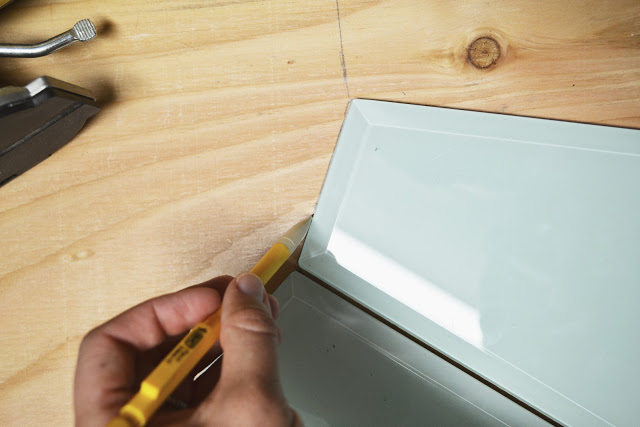
Once all the panes were equal, we marked all of the corners and outer edges so that we could easily line it back up and for the outer cut.
We painted the panes before this step, but I wish I would of done it after, since moving them around removed some of the paint, and touch ups were needed.
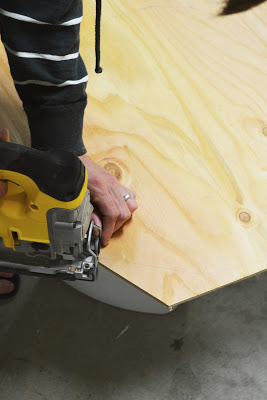
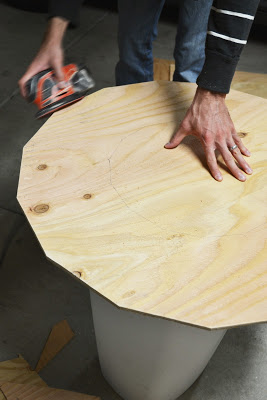
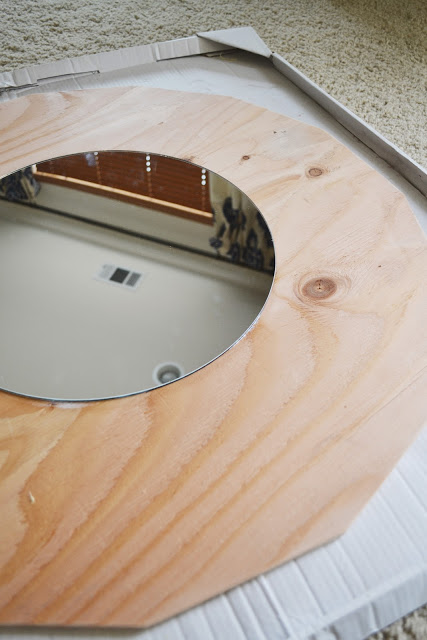
After the panes were marked, David cut out the plywood back following our outer pencil marks with the jigsaw and then sanded the edges.
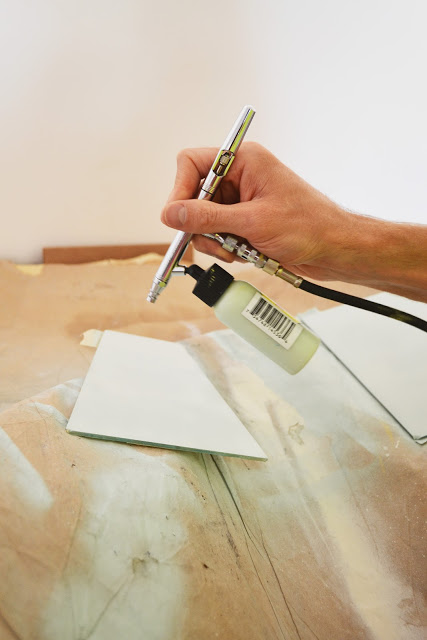
We used an airbrush (we have this one), since we wanted to use the same paint that we used on the chandelier – BM Bali – Spray painting would work great too! (prior to painting, make sure to tape off the front to avoid over spray)
Next, our mirror selection …
We ended up getting a 15″ round 1/8″ thick mirror cut at a local glass shop to slightly overlap the glass panes since getting it cut to meet the 15 angles created by the glass panes would be hard to get precise, and very costly!
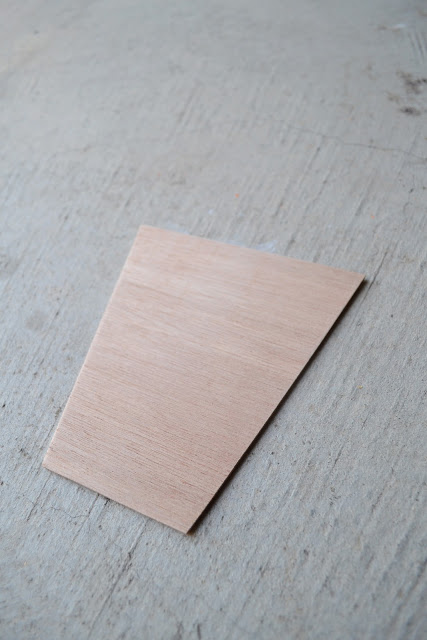
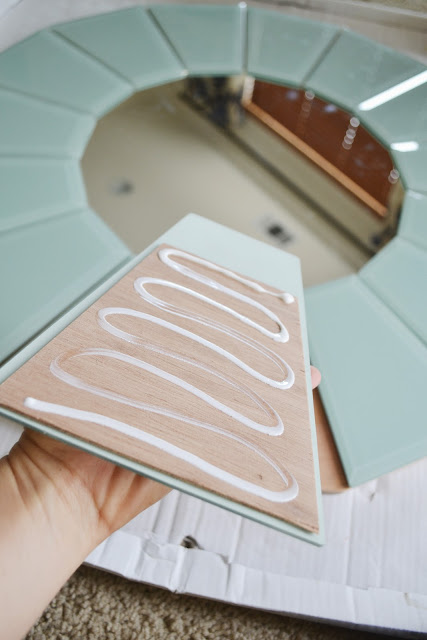
Instead, David cut 1/8″ pieces (any shape will work since it is covered) of lauane with the chop saw (slightly smaller than the panel) to glue to the back of the glass so that the glass panels would fit just over the mirror and be flat, rather than tilted (tip: ask for a scrap piece of 1/8″ board, we got ours for a whopping .25 from Ace Hardware)
These were glued on the back of the painted glass panel with Weldbond glue – our paint looked discolored for about 24 hrs until it fully dried, but then evened out perfectly!
I glued the mirror with Weldbond glue to the plywood (using the pencil marks that I created earlier to center it)
Then I laid the panels out, applied Weldbond glue to the back side and allowed to a few hours so that they were firmly in place (tip: place heavy objects on the glass to hold it down while drying, I used a few books).
After it dried, I applied grout (like you would tile), but instead I would recommend putting the frame first to avoid redoing work like I did 🙂
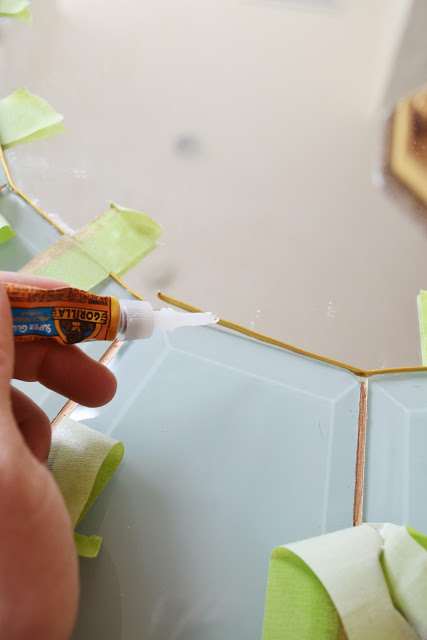
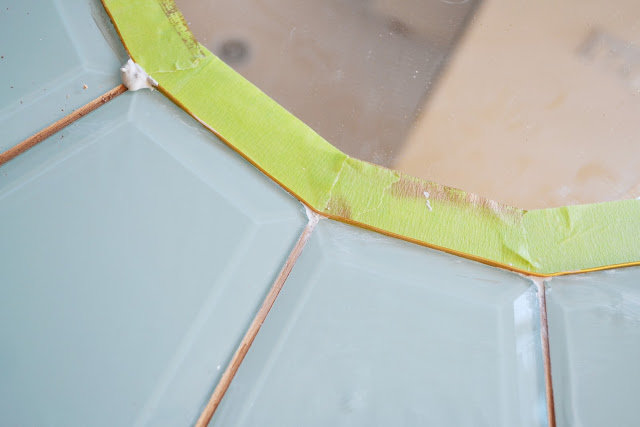
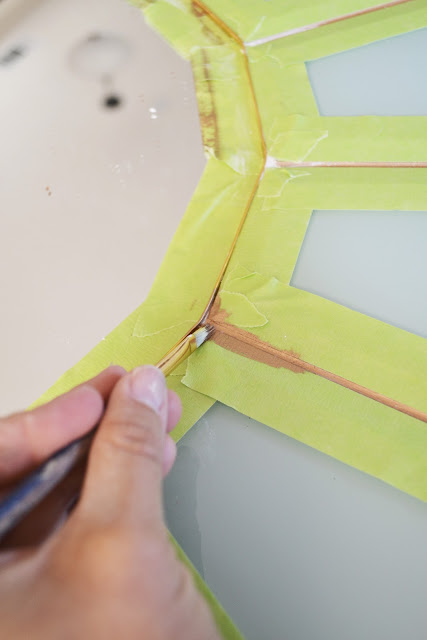
I used rectangular jewelry wire to build the frame for the inside (it was slightly taller than the glass panels) First I laid out the overall shape by bending in the creases and then applied a super glue to secure it (note: to smooth out the wire as you go use something firm – I used a wood putty knife to straighten it by gently pressing against the pane to get it even. I also used tape after the glue was applied to hold in place until dry)
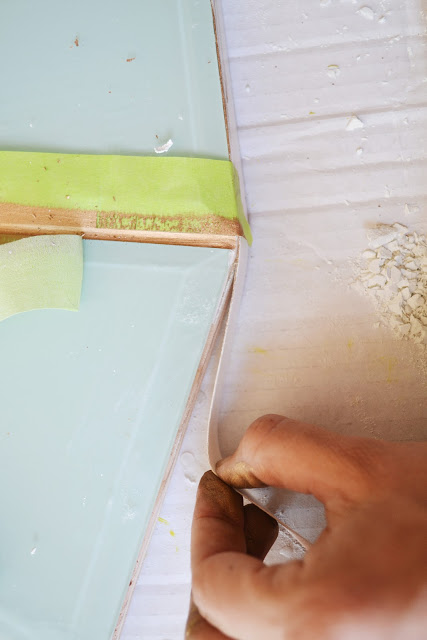
I would of preferred a similar metal strip for the outside, but since I couldn’t find one wide enough (and flexible enough) at a local store, I purchased melamine edging, for the outer edge. Mine was too wide so I cut it to the correct width with a ruler and xacto knife. I glued it with the Weldbond glue, but wood glue would of worked fine too. I also used tape to hold it in place while it dried.
Once the outer edges are dry, its time to grout!
Apply the grout as you would to tile, make sure to fill in all of the crevices!
Once the grout is dry, I taped off the glass and mirror and then applied Rub’ n Buff (I used Antique Gold) over the grout and the trim and then wiped away any exces.
After removing the tape, we used D rings and heavy gauge wire on the back to hang it, since the mirror is very heavy we also applied a little Gorilla Glue in the screw holes for added strength and wire rated for 100 lbs (just to be safe) We then used a drywall anchor like this for the wall that could handle the weight (always look for a stud if possible!)
I did all the finishing touches bent over the floor, I wish I would of used a lazy susan turn table on the table (would of made it much easier!)
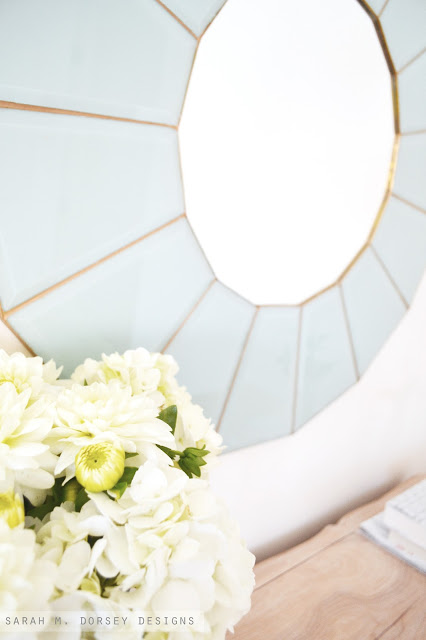
and that’s it! The mirror ended up at 28.75″ in diameter. The perfect size for above the desk in the guest room!
Cost Breakdown and Sources:
Chandelier (already purchased for the drum shade chandelier)
Paint BM Bali (already purchased for drum shade chandelier)
Rub n’ Buff (already purchased at Michaels)
15″ round mirror ——————- $14 (local glass shop)
Brass Jewelry wire —————- $3 (with 50% coupon at Michaels)
Melamine Edging —————– $5 (Home Depot)
1/2 sheet 3/8″ plywood ———– $6 (Ace Hardware)
Weldbond glue ——————— $3 (Micheals)
D Rings ——————————$2.50 (Home Depot)
Heavy Gauge wire (already had)
Total ——————————— $31
It helped that I already had some of the supplies, but I would say starting from scratch, it could be done for under $50 easily, with supplies left over to make another!
This mirror looks high end for the price (at least I think so :), so be on the hunt for a chandelier with a massive glass shell!
—
Update: After hearing from a few people that the glass panes were difficult to remove from the fixture I wanted to mention that our frame was pretty loose and fairly bendable. I have seen ones that are very tight around the glass, so if you would like to try this, I would definitely recommend looking for one that is looser around the glass panes 🙂



Creative and impressive. I love that mirror.
Cheri
This is so amazing and inventive! I am sure everyone is going to go looking for these chandeliers at thrift and salvage stores now, including me! Could you tell me the diameter of your finished mirror? I'd like to know if I make oneto fit over my fireplace (it needs to be around 30 inches or less) Thanks! Amazing job!
Hi Margaret! Than you! The finished mirror is about 28.75" in diameter and my glass panes are about 7.25" long. Happy thrift store hunting!
Thanks!!!
Amazing! I can't believe you saw the potential in that ugly chandelier. It looks fantastic. I love how big it is, but that it's still nice and airy.
I REALLY love this. So creative! I love repurposing & upcycling too, so this is right up my alley. It's great that you were able to create this so inexpensively, and the finished product looks like it's worth hundreds of dollars! I definitely want to make one of these for myself someday…
So beautiful – great work!
Gorgeous! I love how it turned out!
TOTALLY looks high end! Great tutorial. I never guessed that the seams between the panes were grout, I totally thought they were the metal edges from the original fixture. It's such a beautiful, unique piece, great work!
Amazing! Great work!!
I absolutely LOVE that!!! Thanks for sharing
This totally rocks. I wish you lived in Chicago so you could help me get my house into gorgeous DIY shape!
gorgeous 🙂
SO incredible, Sarah!! Such a great re-purpose!
Oh…. My…. God…. That is the most amazing thing ever! Love the mirror! It's gorgeous and you are genius!
i just had to tell you that is such a great vision to make that into this. it's gorgeous!
Hi Sarah! I just have to ask, where did you get your airbrush? I have been using paint sprayers and am not liking the finish they give, not fine enough. What sort of paint do you have to use in airbrushes? Do you like the results? I am using professional canned spray paint right now, but need a more cost effective method. The largest items I paint would be a small box or tray. I'd love your opinion! 🙂
Hi Allison! I purchased mine at Hobby Lobby with a 40% coupon, it is an Iwata Eclipse HP-BCS. I use regular latex paint (thinned down with water) I love the finished result, it is very even and always matte (even with gloss paint) It is would work well for a small box or tray, but much larger would take forever! Depending on how many things you want to paint at a time, I think it would be a good option for you (if are painting a lot you may want to look into a spray gun, here are some that Iwata sells http://www.iwata-medea.com/index.php/products/spray_guns (I have never used this, so I am unsure of the results; however, I would guess that it would be similar to the airbrush, but spray more) Hope this helps! Sarah
Thanks Sarah! Now I'm on a mission!
Hi, I love this project! I actually have one of these lamps in my basement, we took it out of the house when we bought it and I have been trying to figure out what to do with it. Did your lamp have 15 panels? Mine only has 12 so I am thinking it might not make a big enough mirror…I might have to keep my eye out for another one. Thanks!
My fixture came with 16, but we used 15 to get the desired spacing. I think that 12 (depending on size and shape) would create more of a gap on the end to meet in the middle, hard to say without seeing them. You could always take it apart and give it a try 🙂 Sarah
This is so cool. I scored the light for free from a thrift store. Sadly mine also came with 12. Thinking about getting the middle panels cut to make 15 panels. Nice to see more details here then the designsponge.com
Wow! This mirror is GORGEOUS!! It's amazing that it started as one of those builder-grade lanterns from the '80's, and I love that you can personalize it with your paint color of choice (though I'm pretty smitten with the mint color you used) 🙂 It does sound like the project is a bit time intensive, but the results are so worth it!
Anyway, fantastic job! I've added it to my future project list 🙂
Really inventive. Love the finished result. The work was worth it.
This is amazing and such ingenuity! Very inspiring. Thank you for sharing!
This mirror turned out fantastic….great job! Thanks for the step by step! Great use of an old light fixture! Can I share this on my blog…with of course linking back!! Have a great day!
Amazing and beautiful! I love the color you chose.
What a great idea! It looks beautiful!
my fixture also had 12 panes… but i have 2 of them!! wahoo!! Is anyone with as 12 paned-fixture interested in buying some of my extras? i'm more than happy to share!
Awesome! Thanks for sharing! Let me know how the mirror goes 🙂 Sarah
Oh my goodness! Love this SO much! I think I probably have 3 of these light fixtures in my basement right now! So creative!
Brilliant!! I LOVE this..You are so creative.I LOVE your blog..Thanksor the inspiration 🙂
Wow this is so nice. Wish I was handy and had the patience to make this. 🙂
This is my first time to visit your blog and I have to tell you I am just stunned by this piece! I see these all the time at the Goodwill and always wonder what I can do with them, this is just beautiful! I have to look around at all of your other great projects.
Hi Laura, Thanks so much for stopping by and for your sweet comment 🙂
This is amazing! I think it's still out of my skill level at this point, but so so lovely!
Wow, what an amazing project!!! Great vision!
Such a fabulous idea!
Hi, I am coming over from Creating with the Stars.. I LOVE this project..I want to run to every thrift store in town to locate some chandeliers 🙂 New follower 🙂 Would love for you to stop by and visit @ jojoandeloise.com
xo
Angelina
Hi Angelina! Thanks so much! I've found several since my project, hopefully you will too! Let me know if you try it, I'd love to see pictures! Stopping by your blog next 🙂
Whoa! That is genius! I love this transformation. I know Habitat ReStores would love to see this. Hope you don't mind if I share.
Hi Brittany, Thanks so much! 🙂 Would love for you to share with Habitat ReStore! ps LOVE your blog, so much inspiration!
THAT is amazing. Nicely done!
Thanks so much Tracy!! 🙂
What a beautiful project!! I absolutely love it!
Thanks so much Morgan! Love so many fabulous projects on your site! 🙂
Congratulations on making it as a finalist! You did an amazing job, and you deserve your spot!
Thanks so much Nancy! Your nursery was one of my favorites – well deserved in the top 12!! 🙂
congratulations!!! when i read this project a while ago, i thought it was genius, so happy you got recognized and good luck!!
Thanks so much Kristen!! 🙂
amazing! good luck in the competition!
I love this and have one of these chandeliers hanging in my dining room right now! haha I'm looking at it though and wondering how you got the panes out? I would be afraid I would break the glass! Did you use any certain tools or anything? Thanks so much!
We used pliers to bend the metal and clipped it off as we went. Ours was fairly easy to bend because the panels were slightly loose 🙂
This mirror turned out amazing… Such a clever idea! Good luck!
that is amazing! i always see those 80s chandeliers and wonder what I could make out of them….thanks fo rthe idea :).
Holy cow!! How on earth did you ever come up with that? I LOVE it! I found you over at It's Overflowing. This is just amazing. So glad you shared!!
Debbie
Hi Debbie, Thanks so much for stopping by!! We purchased the chandelier to put inside of a drum shade (when I was checking out I asked if I could leave the shade there if they could resell it … they said no, thankfully!) My husband and I were taking it a part to get the chandelier out and he started laying the glass in a circle and then I said that it would make an amazing mirror! It's funny how sometimes your favorite projects are unplanned!
This is impressive and creative way to remake a chandelier. Love it!
Sara
I've noticed your mirror countless times on your blog. I've always loved it, but I had no idea you MADE it. Amazing! Love love love it.
{lamourcheznous.com}
That mirror is just so stunning. Would NEVER have believed it was made from one of the most arguably hideous remnants of the 1980s, the brass and glass chandy. Unbelievable job.
I just came across your blog and I love it! I love your style. I am a DIYer myself and I can't wait to try some of these thing out in my own home.
Thank you!
This diy project is nice..really nice
Love, Love, Love this. Did you use just regular paint to paint the panes? Will the paint look okay if I DON'T use an air tool? Also, what exactly IS brass jewelry wire? Kind of confused by what to look for. Thanks so much for all your hard work in publishing this tute!
absolutely amazing! Thank you for sharing!
This is seriously amazing!
4 years late, but it is still amazing.
Lovely